git, GitHub and R Studio

UW R-Ladies

4/14/23

What is ‘Version Control?’

  • A system to keep track of changes you make to a file, and revert to a previous version if something goes wrong

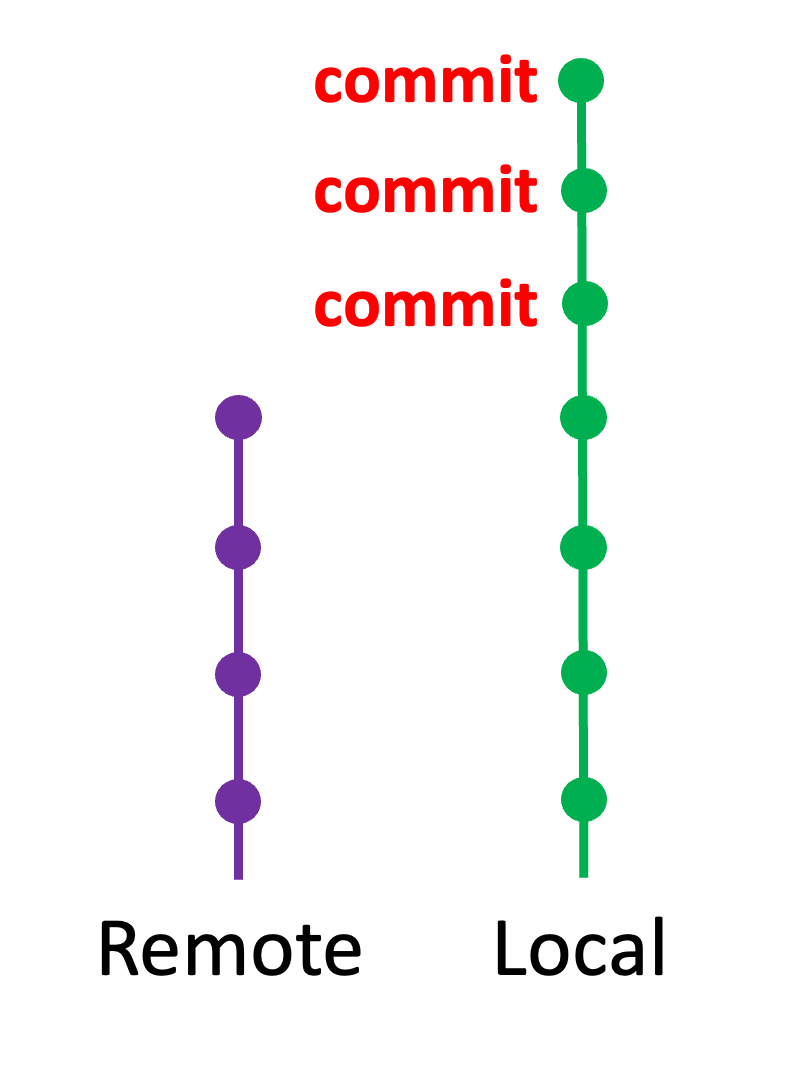
  • Changes are recorded and documented in a “commit”

  • The record of commits is version control!

Climber on a wall

Climbers falling on a wall

When would you use version control?

  • to keep track of changes that you make in your files
    • you have a record of when and why you made changes to a file
    • you can revert to a previous version of a file quite easily! (and if you have informative commit messages, it’s easy to find the version you need!)
  • to have a record of changes that multiple people make to files on a shared project

How do you use version control?

one of the most common version control software programs, and is free and open source!

  • git adds a “.git” folder to a repository and records your commits/adds there

  • git does not track changes automatically. You need to make commits using the command line or a git client GUI

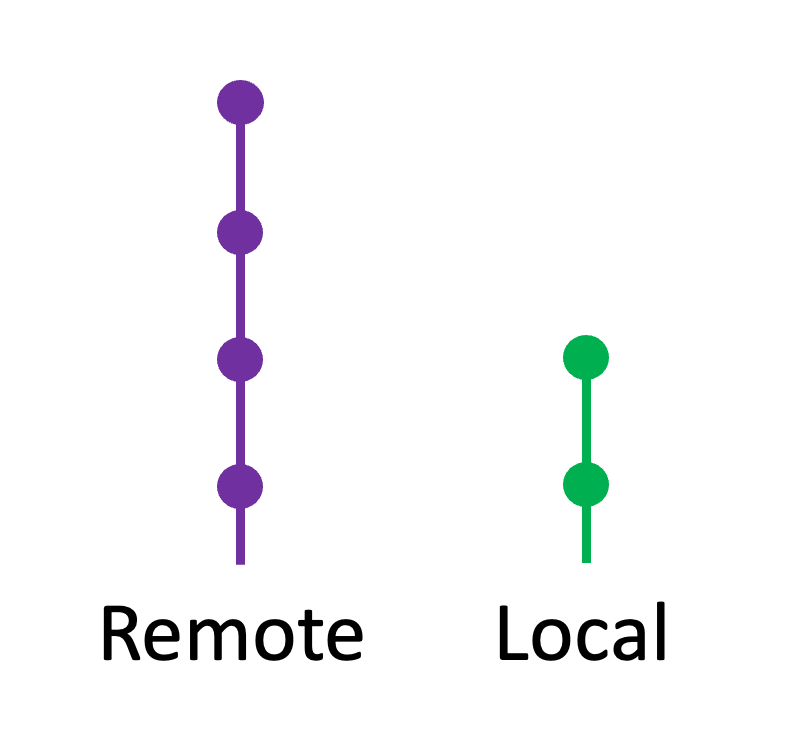
git becomes even more useful when you connect your local git repos to a remote git service such as GitHub

  • A remote version of your repo is saved online, which is a great backup!
  • Really easy to work across different computers!
  • Open Science/Code sharing!

What does a Basic git/GitHub workflow look like?

  • When you begin work for the day, you pull from the remote repo to make sure your local version is up to date

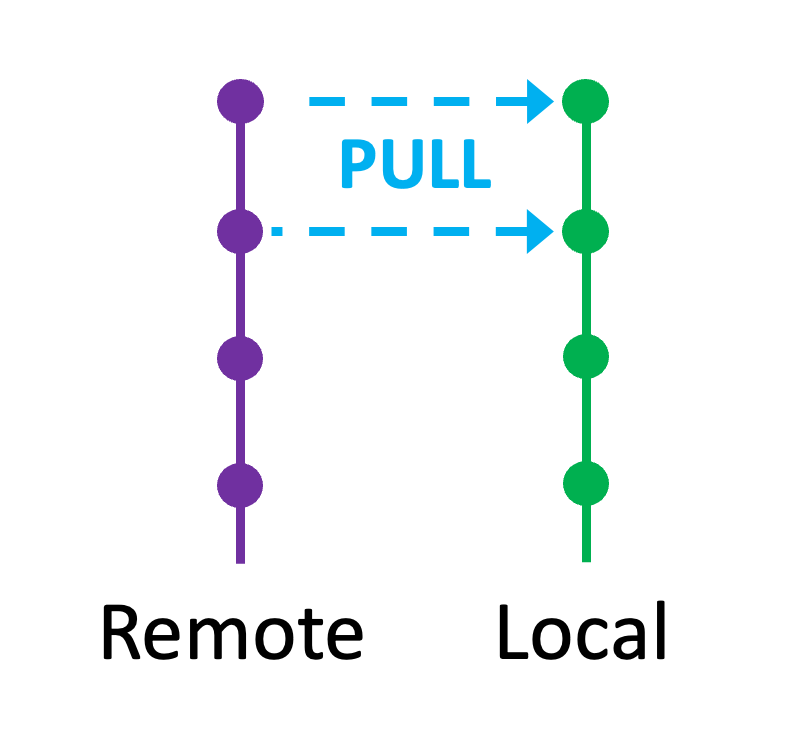
  • Make commits in the local repo as you work
    • can use the command line or a git client (including R Studio)!

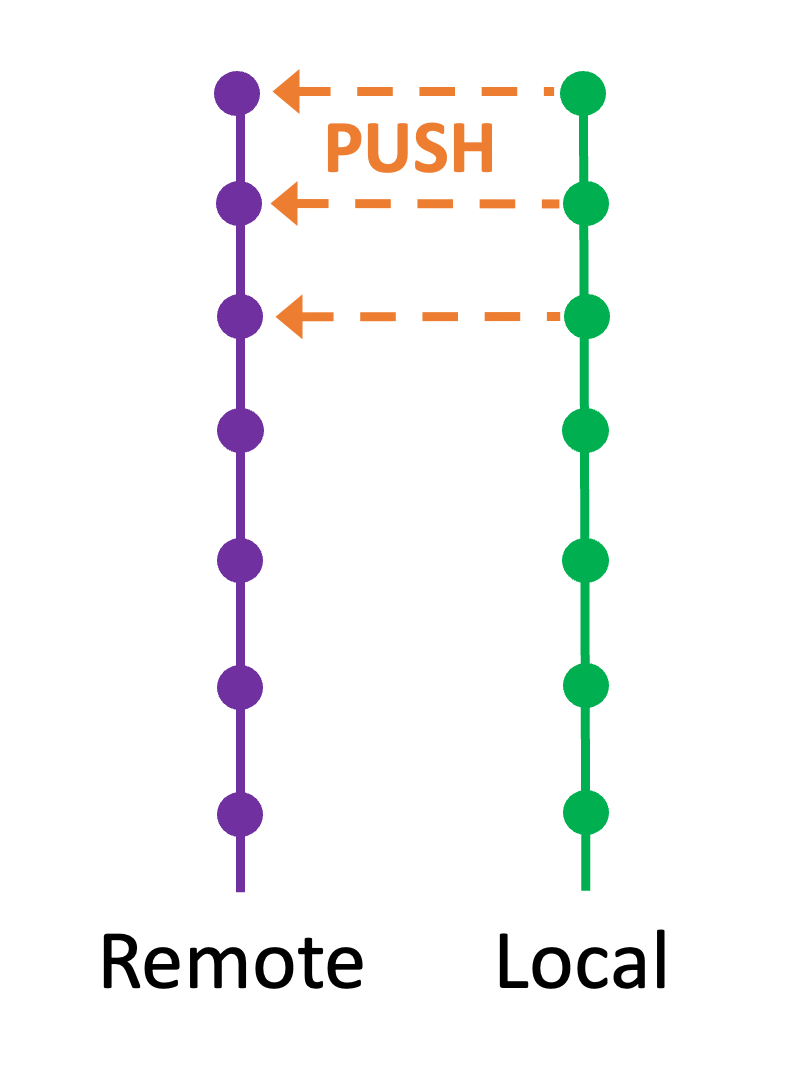
  • At the end of the day, push to the remote repo, which sends your changes (and the git record of your commits) online

Important Miscellaneous Info

  • All your repos are public on the free version of GitHub. People won’t be able to push or pull without your permission, but they will be able to see your code!
  • git is typically used for code, but can work for other files too! (Word, Overleaf, etc.)
  • Don’t store data in git repos
    • takes up a lot of room (there are size limits on GitHub)

    • you typically aren’t changing raw data (hopefully!), so it’s not really useful

    • you can still store data in a repo, but put it in a folder that included in the “.gitignore”

Let’s get started!

Goals:

  1. Make sure that git, R and R Studio are downloaded on your machine, and that you have a free GitHub account.
  2. Establish a connection between your computer, GitHub and R Studio
  3. Make a repository!
  4. Practice pulling, committing, and pushing

Note: All of these steps are very well explained on Jenny Bryan’s amazing website, happygitwithr.com

Introduce git and GitHub to each other

There are two formats git and git servers can use to communicate with each other, HTTPS or SSH. Each require two elements for authentication:

  • HTTPS: GitHub username + Personal Access Token
  • SSH: Private SSH key on your computer and it’s public counterpart on GitHub

You can store these access credentials in your local git .config file, but you need to decide on SSH or HTTPS first. We’ll use HTTPS because it’s easier to set up (you can easily switch to SSH later!).

First, we’ll store your GitHub username information

  • You can use the command line…
  • or you can use the “usethis” package in R Studio
install.packages("usethis")
library(usethis)
use_git_config(user.name = "R Lady", # your GitHub username!
               user.email = "lady@Rladies.org" # GitHub account email!
               )

Next, we’ll generate and store a Personal Access Token (PAT)

PATs are the style of authentication key that HTTPs uses

  • Use the usethis::create_github_token() function in R to generate a PAT -this will take you to the GitHub PAT website
  • Give the token a name – you can use the same PAT for everything, or you can set up one for each computer. If you do this, give the token an informative name
  • Select the expiration date (up to you) and the “scopes” (the actions the token can authenticate)
  • Click “generate token”

Don’t navigate away from the next page!

We need to store the PAT in your local config file, and you won’t be able to see it again once you leave this page!

  • We’ll use the gitcreds R package to store this PAT in your config file
  • run the function gitcreds::gitcreds_set() in the R console
  • The prompt ? Enter password or token: will appear. Copy the PAT from the GitHub page, and paste it into the R console and press enter.

Now we’ll make sure that R Studio can find git

  1. Open up R Studio
  2. Go to “Tools” > “Global Options” > “Git/SVN”
  3. Make sure the “Enable version control…” box is checked, and close that panel by clicking “Apply”
  4. Go to “File” > “New Project..”. Is there a “Version Control” options? If there is, great! If not, follow the instructions here: https://happygitwithr.com/rstudio-see-git.html

Now we can make a git repository, and push and pull from GitHub!

  1. Go to https://github.com and login
  2. On the left panel, next to “Top Repositories,” click the “New” button
  3. Name your new repo, and (optionally) add a Description and check the “Add a README file” box. Then click the “Create Repository” button at the bottom of the page! Don’t navigate away from this page…

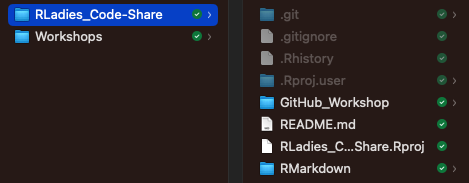
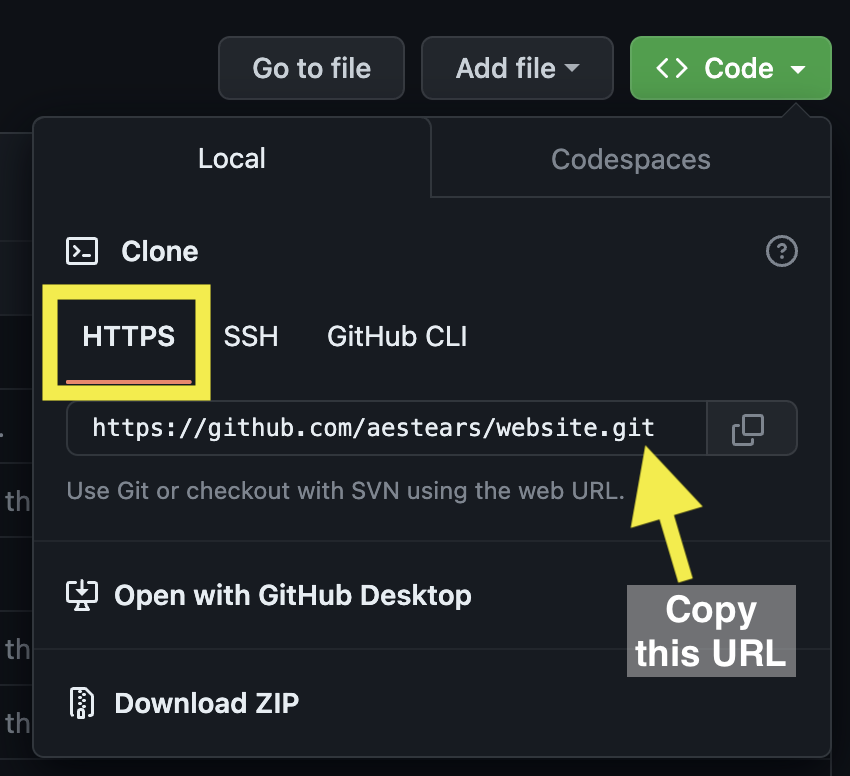
Now we’ll “clone” the repo from GitHub to your local computer

  1. In R Studio, go to “File” > “New Project…” > “Version Control” > “Git”
  1. On the GitHub page for the repo you just created, click the green “< > Code” button, and copy the URL

  1. Back in R Studio…

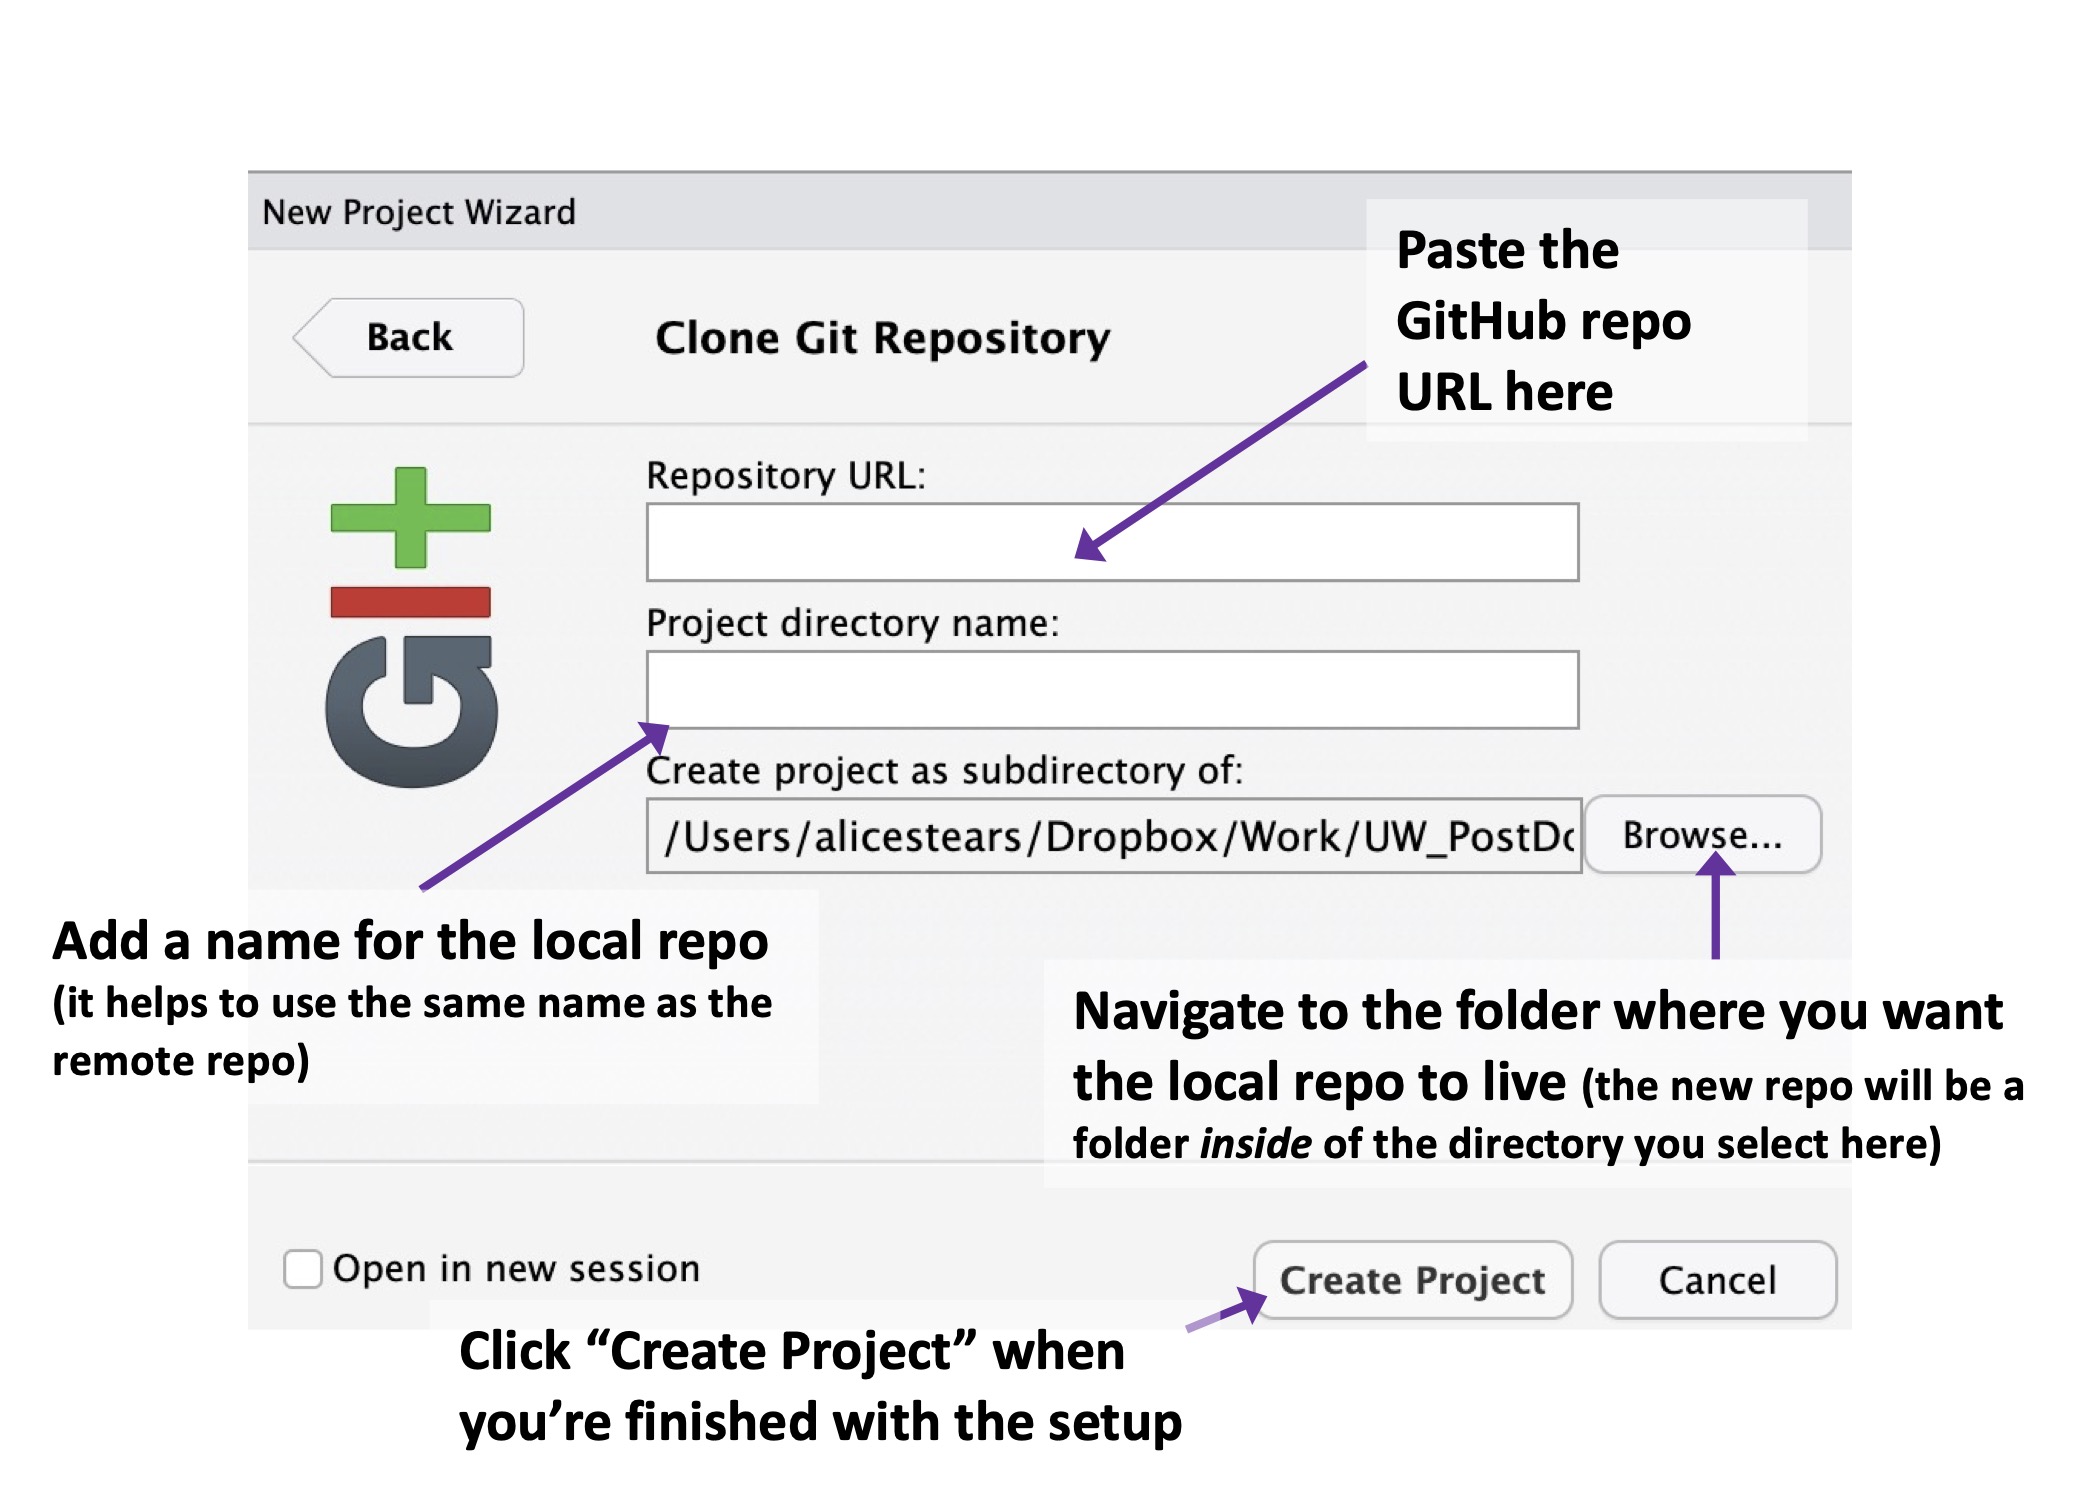
  1. Now, look in the folder where you put the repo… it should be there!

Now we can start editing our git repo!

(Note: We normally would begin by pulling from the remote, but that wouldn’t do anything here because we just cloned the repo)

  1. Back in the R Studio window, create a new file, add some code, and save. In the panel where the environment is, select the “git” tab. Every time you save changes to a file in the repo, the file name will show up here

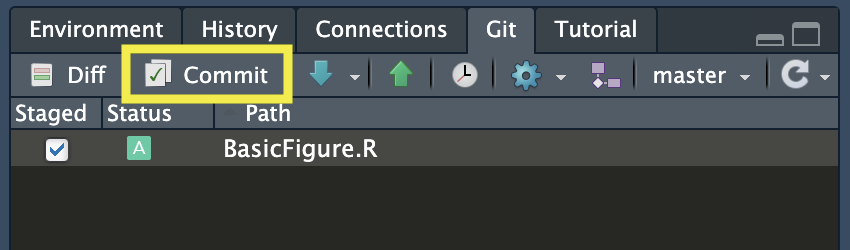
  1. Once you’ve made some changes and are ready to commit, click on the “Commit” button

Fill in the panel that pops up to make a commit

  1. Now, practice by making and committing another change to the original file.
  1. Oh no! You actually don’t want to keep the changes that you just committed– You want to convert the file back to the way it was at the previous commit!
  • There are several ways to do this, but we’ll do a “revert”
  • We need to use a bash shell for this, but don’t worry! It’s easy, and we can do it inside of R Studio!

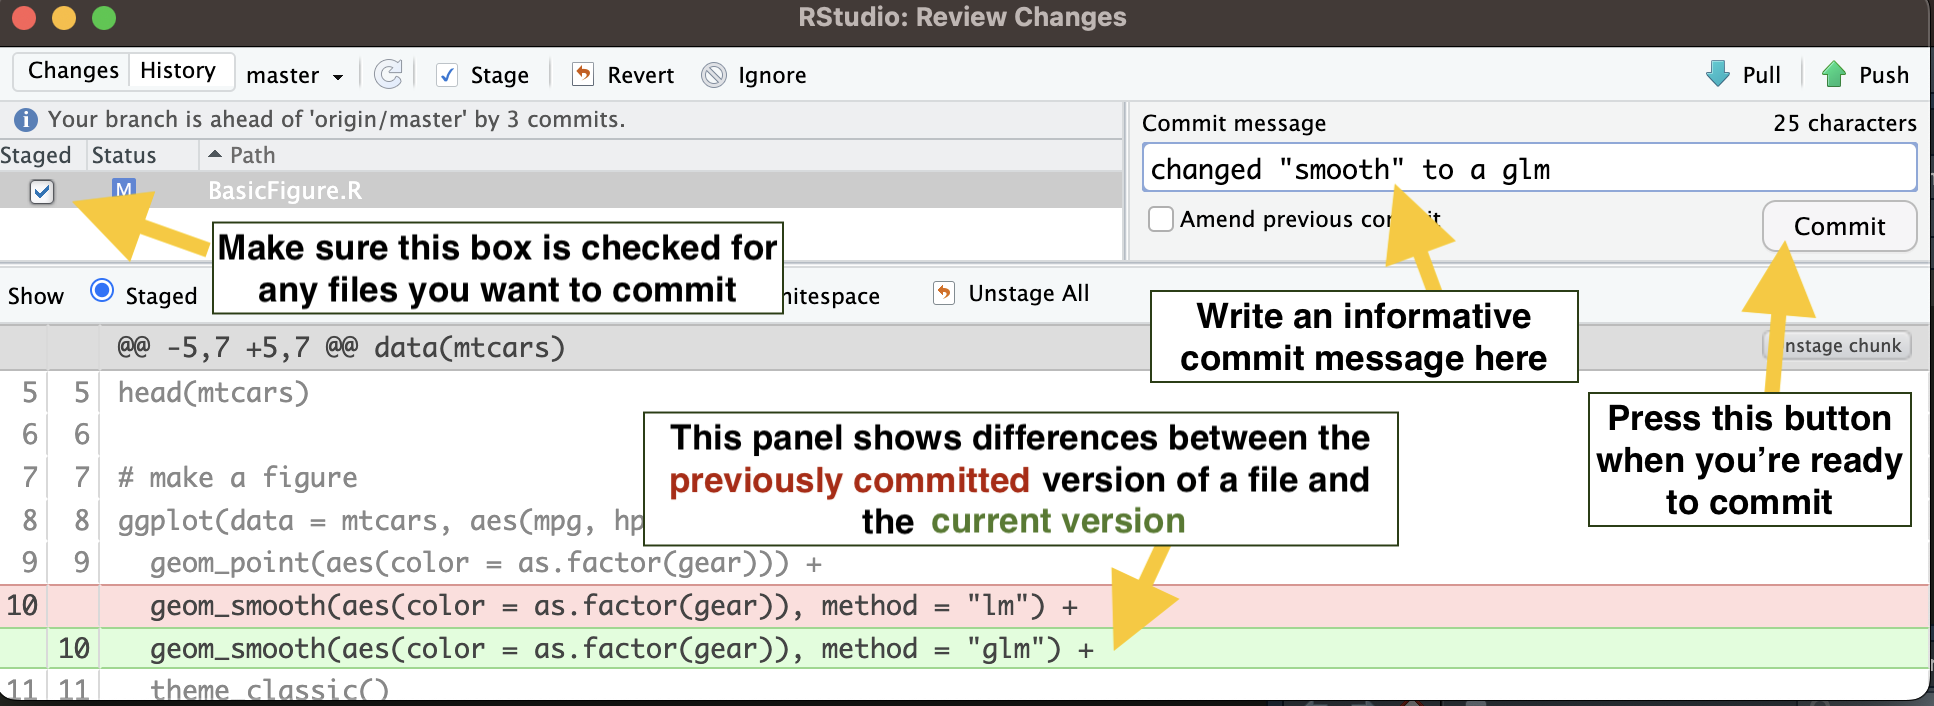
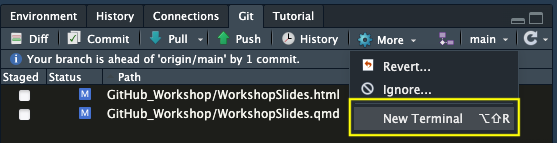
  1. Open a new terminal window from inside of R studio
  2. In the Terminal window that opens, use:
git status

This checks if there uncommitted changes. If the terminal says anything other than nothing to commit, working tree clean, commit your changes.
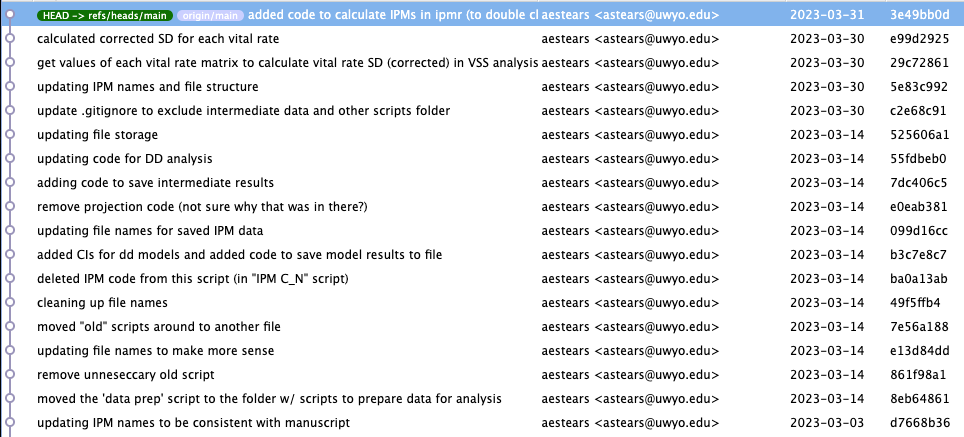
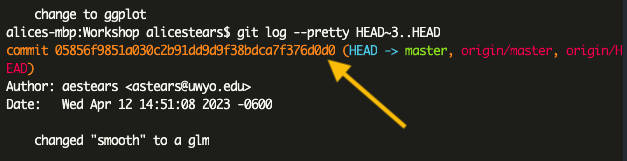
13. Then, look at the most recent commits in this repo:

git log --pretty HEAD~3..HEAD

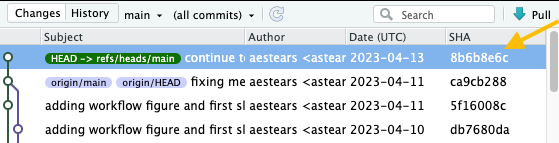
  1. You can also do this via the R Studio git client… Click the “diff” button in the “Git” panel, and then the “History” button in the upper left corner. Click on a commit to see the changed files below.

  2. Whichever method you chose, copy the “SHA” of the commit you want to revert to

  3. In the Terminal window, use the git revert command to take your repository back to the commit you’ve chosen

git revert YourCommitsSHAnumber

  1. Oh no, an error! There is a merge conflict, which means that file(s) in your local repo don’t match the file(s) in the commit you’re reverting to. We need to resolve the merge manually.
  2. The merge conflict message in the Terminal will tell you which file contains the merge conflict(s). Open up that file in the R Studio editor. There will be a segment of the file that looks like this:

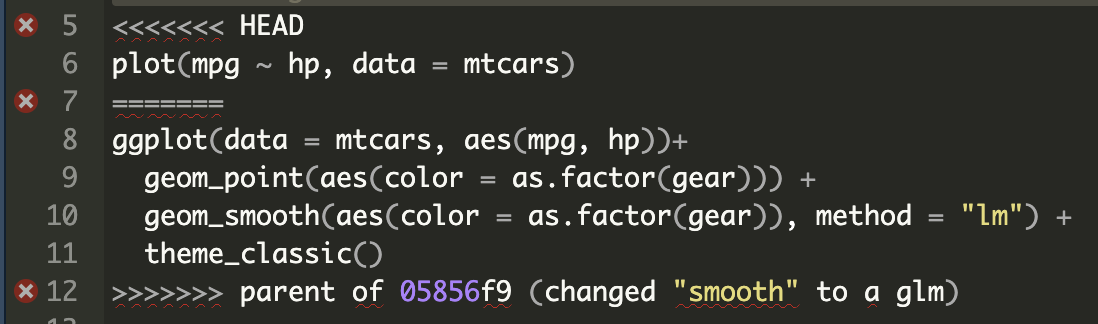
“<<<” and “>>>”: make the beginning and end of the merge conflict
“===”: divides the two conflicting versions

  1. Now, decide which version you want to keep. Delete the other version (above or below the “===”), as well as everything in the lines with the “</>”. Commit your changes, then push them!

Going back to a previous version the lazy (but sometimes easier) way!

  • One of the great things about using GitHub or other remotes for git repositories is that they offer a great GUI for looking at past versions of your files
  • GitHub also has URLs for every past version of a repo so you can share past versions easily!
  • We can take advantage of this to revert to a previous version of a file

  1. Head to your online GitHub repo, and click on the name of the file that you want to in revert.
  2. Then click the “history” button

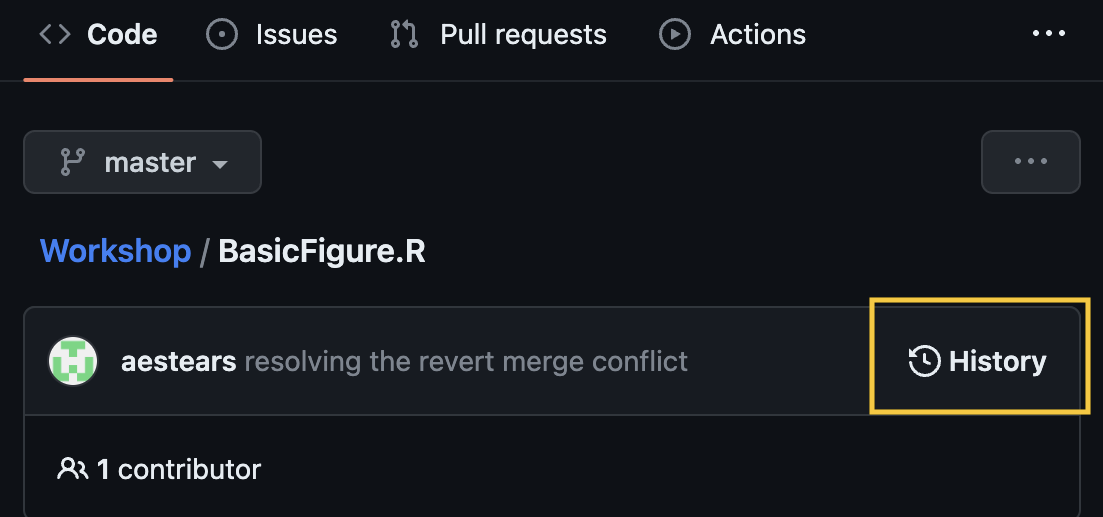
  1. Then, click on a commit to see the version of the file at that time. Then you’ll see the file versions before and after the commit

Now for the non-Git-nerd part…

  • Once you’ve found the commit with the version of the file you want, copy the code from that page (everything, or just what you want to change) and paste it into that file in R Studio.

  • Then, make a commit with an informative message!

  • This isn’t necessarily the most by the book way of doing things, but sometimes it’s a lot easier than doing a git revert!

Topics for next steps

Resources, futher reading

Take Aways

Don’t be afraid to mess up! Just like with R, there are a ton of online resources about git and GitHub, and I’ve always been able to solve problems I’ve run into by Googling an error message!

You can do it!